Deep Fried Beer Brined Turkey
 The brining technique is different than simply marinating or salt curing a meat/poultry product. By submerging a protein (turkey | chicken | Cornish game hens) into this liquid medium, it allows the properties of osmosis to do its work, resulting in flavoring the protein from the inside out. Crafting a liquid with the right balance of sodium, sugar and flavors (in this case Craft Beer with some herbs and vegetables) becomes the basic medium. The natural moisture in the protein is replaced with flavors of the brine that also hydrate the meat, increases the tenderness by denaturing the proteins, helps preserve the ingredient and provides a temperature cushion, preventing the main course from drying out.
There are several ways to cook this beer brined turkey. This method teaches you a safe way to deep fry a turkey (see Safety Tips below). For other cooking techniques of this recipe, there are links to all the ways this base recipe can be cooked below. This recipe yields enough brine for a 16 – 24 pound turkey.
A quick note on frying oil. Not all oil is great for frying at a higher temperature. As I mention in my Hot Oil Fondue recipe, it is important to understand the different smoke points in the varieties of oils available for cooking. The type of oil used for frying food is important, as it becomes the cooking medium. I suggest rendered fat over oil, as it has more flavor, the moisture has been removed and usually has a smoke point. My favorite fats to use are rendered duck fat (the most flavor, IE think duck fat fried potatoes or in this case fried chicken), rendered pork fat or beef tallow. For oil, it is important to understand the smoke point of a refined vegetable oil. Not all oils are equal when it comes to heat, as the oil can burn, denature and not be as good for you. I suggest Avocado oil (520°F | 270°C), rice bran oil (450°F | 232°C), refined peanut oil (445°F | 231°C) or coconut oil (450°F | 232°C). These oils have a higher smoke point or higher temperature, to prevent the oil from burning. Do not use canola oil, vegetables (corn safflower | sesame), extra virgin olive oil or other GMO oils that have high amounts of Omega 6, as they can easily burn or go rancid faster.
Before You Shop:
Listen to my Home Brewed Chef podcast Thanksgiving Dinner Show for more menu ideas, techniques and recipes.
Special Equipment for Deep Fried Beer Brined Turkey:
1 each Thermapen Cooking Thermometer
and | or
1 each ChefAlarm by ThermoWorks
1 each large stock/brew pot, at least 8 gallons in size and enough oil to fully submerge the size turkey you are beer brining
1 each Cajun cooker or high BTU free standing propane burner
Check out my Thanksgiving Feast for more ideas, recipes and suggestions.
Have turkey bones? Make the best Turkey Stock with this recipe.
| Servings | Prep Time |
| 16 guests | 30 minutes |
| Cook Time | Passive Time |
| 40 minute | 2 - 3 days |
|
|

|
Deep Fried Beer Brined Turkey: Learn how to safely deep fry a beer brined turkey, resulting in a super tender, juicy, full flavored bird!
|
- 1 quart water filtered
- 2 cup salt, kosher do not use iodized salt
- 1 cup sugar, brown light
- 1 tablespoon peppercorns, black whole
- 4 each bay leaves preferably fresh
- 3 bunch thyme, fresh
- 3 each onions, yellow peeled and chopped
- 3 stalks celery chopped
- 3 each carrots, large peeled and chopped
- 6 each garlic, cloves peeled
- 1 each lemon cut into slices
- 1 each orange cut into slices
- 6 pound ice or 3 quarts ice cold water
- 1 gallon beer, ice cold such as American Brown Ale, Märzen | Oktoberfest, Bock or Scotch Ale | Wee Heavy, see note below on cooking beer suggestions
- 16-24 pound turkey preferably free range, organic or heritage
- 1 bunch sage, fresh
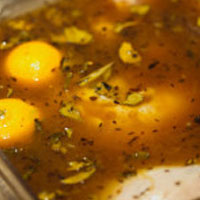
- At least 2 days in advance of Thanksgiving | event | Holiday, start the brine. In a large pot, over high heat, add the water, salt, sugar, peppercorns, bay leaves, thyme, onions, celery, carrots, garlic, lemon and orange. Bring the liquid to a boil and simmer for 10 minutes to infuse the flavors together, dissolving the salt and sugar. Turn off the heat and let the brine cool for 20 minutes, then add in the ice and beer of choice. Mix the ingredients together and take the temperature of the finished brine. A thermometer should read 40°F | 4°C or lower in order to be safe to use. If it is warmer, place the pot into a refrigerator/kegerator until 40°F | 4°C is reached.
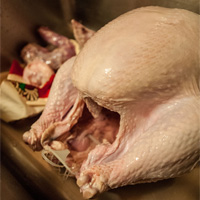
- Take the fresh turkey and remove it from its package in a large sink. Remove the neck, gizzards and liver, setting aside (for stock or gravy). Rinse the bird under cold water, turning the bird over a few times, washing any blood from the cavity and under the neck flap. Remove any remaining quills from the skin, if visible. Remove any excess fat from around the inside cavity. Turn off the water and lightly dry the turkey off with paper towels.
- For brining, have ready a Cambro 22 qt Polypropylene Food Storage Container
, large stock/brew pot, a brining bag or Ziploc XL HD Big Bag
. Place the turkey into the container of choice, then top off with the chilled brine, submerging the turkey completely. Then place in the cold storage, for example a refrigerator or kegerator.
- If cold space is an issue, use a large cooler and sanitize it with a bleach water solution (1 tablespoon of bleach per gallon of water or 200ppm) or Star San (1 ounce of StarSan per 2 gallons of water). Place the cooled beer brine into the now clean cooler and add the turkey. Use several gallon size seal-able bags fill with ice, to keep the bird and brine ice cold, but not diluting the salinity or flavor of the brine. This will also work if you are beer brining multiple turkeys at once and have doubled or tripled the beer brine recipe to fill the cooler size you are using.
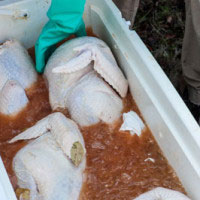
- Beer brine the turkey for at least 24 (for a smaller bird 16 pound) to 48 hours (for a larger 22+ pound bird). Keep the turkey and brine cold during this marinating process. Every 12 hours, rotate/flip the turkey in the brine to evenly marinate it.
- The fastest way to cook a turkey is placing it into a hot cauldron of oil. Because of the large size of a turkey and the displacement (or amount of space it occupies) and thickness of skin/meat/bone, a smaller sized turkey (no larger than 16 pound) is better for frying. This will require less brine submersion time. Yet, the turkey will need more dry time post brine, to make it safer to fry it in the hot oil.
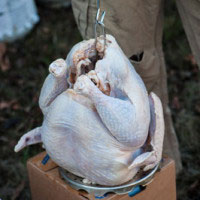
- The moisture of the turkey is an important factor in its deep fat frying voyage. Whether you are just frying a bird right out of the wrapper, injecting it with beer or beer brining, it is important to know this important fact of culinary science: moisture when mixed with hot oil creates steam. This water vapor causes oil to bubble and boil. The less moisture present on and around a turkey will dramatically reduce the amount of bubbles caused by steam and make frying a turkey a lot safer. Dry the turkey very well with multiple wipe downs with many paper towels both inside the cavity and around the skin at every joint. The goal is to try to get the skin as dry as you can.
- Once the skin is dry, get your brew or stock pot out. The size of the cooking pot matters. Make sure you have a large pot, a stock pot or brewing pot with at least 8 gallons of holding volume. Fill your pot about half way with a good quality fry oil. I like to use oils that have a higher smoke point, so that they don’t burn when cooking. Having the right type of oil and monitoring the heat source from going too high in temperature will prevent the oil from burning.
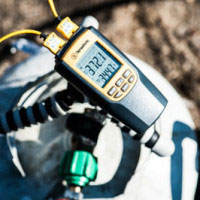
- Oils with a higher cooking temperature (smoke point) making them great for frying are rice bran oil (490°F | 255°C), peanut oil (450°F | 233°C), sunflower oil (440°F | 225°C). Rice bran oil is the most expensive, but will create a wonderful flavor and will be a long lasting oil, being able to use it a few times for multiple turkey cooking (or filtered and used at another time). You will need approximately 2 ½ - 4 gallons of oil. The ideal amount of oil, is when the turkey is fully submerged into the hot oil, there will be at least 2 inches of oil above the turkey. More than this could get the level of the oil too close to the edge of the pot, which could bubble over, causing a potential fire hazard. If you use a 10 gallon pot, you will need more oil, like 5 gallon. It is also important to place the cooker/burner (a brewing burner or propane burner like a Cajun cooker) in a safe place away from anything that might catch fire (bushes, trees or other landscaping), on level ground, not close to the house/garage, on dirt or a cement ground (not a wood deck). Place the pot filled with oil over high heat. Once the oil reaches 375°F | 191°C the turkey is ready to be added. Make sure your turkey is free of all plastic (sometimes there is a plastic piece near the tail bone, that is used to hold the legs together or a pop-up thermometer (if using such bird). Also remove any excess fat from the opening of the cavity. if you haven't done this already.
- The next thing to consider is how to get the large turkey in and out of the hot oil safely. Here are a few different options and things to consider: The String Method: truss the whole turkey with a good kitchen twine, creating a good sized loop at the end of the legs, so you can grab it and retrieve the turkey from the oil. Using a long pair of long kitchen tongs, put the handle of the tongs through the loops of the twine from the legs. This isn't the easiest method to get the turkey in and out of the hot oil, but it is the cheapest and if you aren't planning on frying many turkeys, this technique will work.
- The Fry Basket Method: a large fry basket that has holes in it, with a large enough diameter to hold the turkey around the breasts. Make use this basket fits the diameter of your cooking pot. These holes will allow the oil to drain in and out of the basket. This fry baskets usually have a handle that you can use to lift the basket in and out of the hot oil. A separate hook/handle is then used to lift the turkey.
- The Turkey Stand Method: The last way to safely remove a turkey from a deep fryer is if you have a turkey stand. These sometimes come with a deep fry turkey kit. The stand has a base and a long loop/pole that goes inside the cavity of the turkey and comes out the neck (or putting the loop through the neck and out the cavity, reverse the position of the turkey being right side up, or upside down).
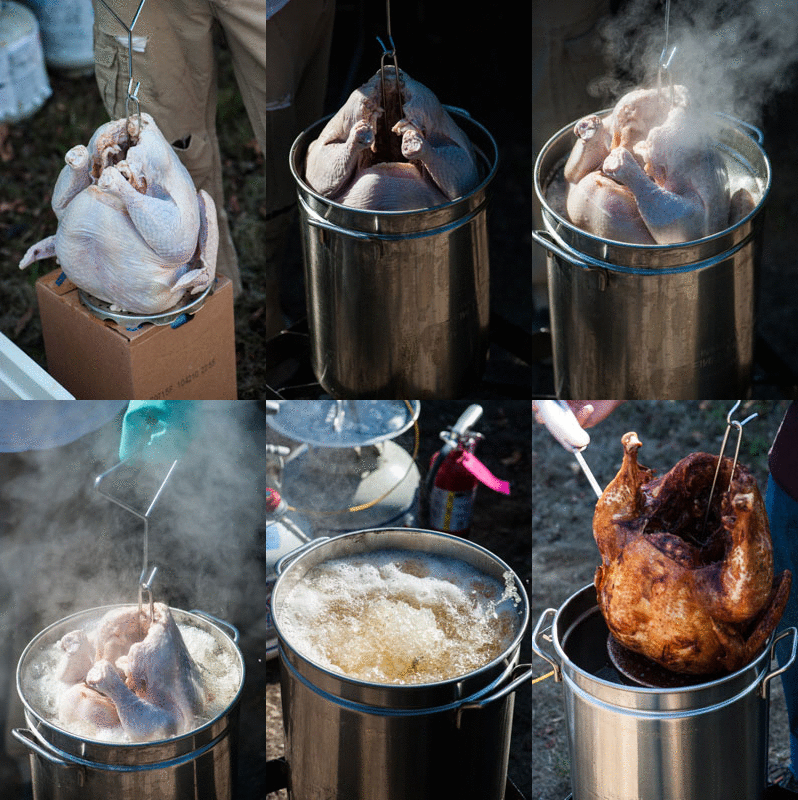
- Turn off the flame before adding the turkey. This will help remove the risk of any oil bubbling over the sides and down to the heat source, causing a fire. Put on some kitchen gloves, to protect yourself (steam will be created when the turkey is dipped into the oil) and get the turkey.
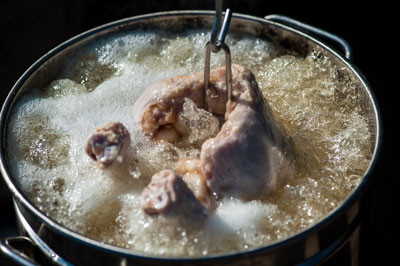
- Now, carefully dip the turkey about 1/3 into the hot oil, not completely submerge it. Retract the turkey after 30 seconds and repeat, watching each time the turkey is dipped and the amount/size of the bubbles in the oil. As the remaining moisture dissipates, the turkey can go deeper into the oil, repeating until the whole turkey goes in and the there is no issue with the oil bubbling over the edge of the pot. This will take a few minutes and some strength to do.
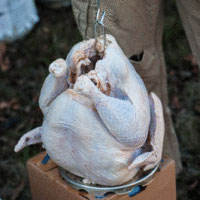
- Once the turkey is fully submerged in to the hot oil, take some paper towels and wipe the outside of the pot being used. If any of the oil bubbles boil over the edge of the pot, the drips dribbling down the sides can potentially catch on fire. That oil will also cake on to the side of your pot, making cleanup that much longer. The temperature of the oil will have dropped significantly. This is not a problem. Turn/re-light the heat source and bring the temperature of the oil to 350°F | 177°C. Adjust the flame to keep as close to this temperature as possible. Periodically, using a hook, lift the turkey partially out of the oil, to re-distribute the oil, replacing hot oil into the center cavity of the turkey, helping the turkey to cook as evenly as possible.
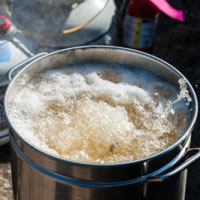
- As the turkey is cooking, have a clean pan/rack ready to place the turkey into when its done cooking. It should take about 30 – 35 minutes to cook a 16 pound turkey. Many different variables affect the cooking time. The temperature and volume of your oil, the BTU or flame strength of the burner, the temperature of the turkey when it went into the oil. The size of the turkey. Because of all these variables, I like to use an instant read probe style thermometer to check the temperature. The internal temperature should read 155°F|68°C and the turkey is done. Check the temperature of the breast meat, making sure the tip of the probe isn't touching a bone, or you will get a false reading.
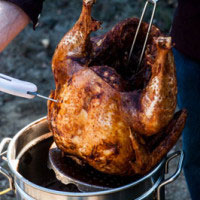
- Also check the temperature of the thigh, again being careful to not touch the bone.
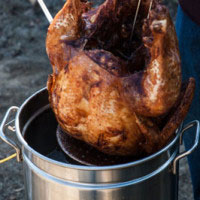
- Once the turkey comes to temperature, let the cooked bird drain any oil for a minute. Place onto the rack, cover with aluminum foil and let rest for 20 - 30 minutes. The carryover heat from the deep frying process will finish cooking the turkey to a safe 165°F | 74°C.
Cooking Beer Suggestions:
With turkey meat much like it's fowl cousin chicken, there isn't a ton of unique flavor; it's very subtle. I have found that using beers that use a good percentage of melanodin malts add a rich flavor to the turkey, enhancing the maillard reaction that occurs during the cooking process. Beer styles like German Bocks, Doppelbocks, American Brown Ales, English Brown Ales, Dunkelweizen, Vienna Lagers, Roggenbier, Scotch Ale | Wee Heavy, Irish Red Ale and Märzens | Oktoberfest all compliment the flavors of turkey with this beer brine recipe. Below are some other beer style and brewery versions of this recipe, each adapting the beer brine to fully utilize the beers nuances in flavoring the turkey.
Safety Tips when Deep Frying:
A quick note on safety. This might seen obvious to most, yet still important to consider when cooking with hot oil. Here are a few tips:
- DO NOT FRY INDOORS!
- Have long pants on
- No opened toed shoes
- Have a fire extinguisher (that is current and not expired) near by
- A water hose (not to use if a oil fire starts - it will make the fire worse, but to use to wash hands or if a fire spreads) near by
- A roll of paper towels nearby to wipe up any spills, clean hands, etc.
Step by Step pictorial on how to deep fry your turkey:
Other Ways to Cook This Beer Brined Turkey:
- BBQed Beer Brined Turkey
- Grilled Beer Brined Turkey
- Oven Roasted Beer Brined Turkey
- Smoked Beer Brined Turkey
- Sous Vide Beer Brined Turkey
Alternative Beer Brine Turkey Recipes:
- Allagash - Tripel and Tangerine Beer Brined Turkey
- Asian Style Beer Brined Turkey
- Dawn of the Red Polynesian Inspired Beer Brined Turkey
- Dogfish Head - Indian Brown Ale Beer Brined Turkey
- Firestone Walker - Double Barrel Ale (DBA) Beer Brined Turkey
- Lagunitas - Little Sumpin Sumpin Beer Brined Turkey Recipe
- Moroccan Style Beer Brined Turkey
- Oaxacan-Style Beer Brined Turkey
- Rogue Ales - John John Juniper Pale Ale Beer Brined Turkey
- Sierra Nevada Tumbler Autumn Brown Ale Beer Brined Turkey
- South of the Boarder Style Beer Brined Turkey
- Tipsy Turkey – Craftbeer.com
- Turducken


The beer Brine deep-fried turkey turned out to be the best turkey I’ve ever had hands-down I do have a beer you could add to your list for the Brine that’s the Molson larger and it was awesome