Beer Brined Turkey
Beer Brine Turkey: How To and Why
The technique for beer brined turkey is different than simply marinating or salt curing a meat | poultry product. By submerging a protein (turkey | chicken | Cornish game hens) into a liquid medium infused with salt, herbs, and beer, it allows the properties of osmosis to do its work. The resulting time submerged in a Beer Brine flavors the protein from the inside out. Crafting a liquid with the right balance of sodium (salt), sugar, and flavors (in this case Craft Beer with some herbs and vegetables) becomes the basic beer brine medium. The natural moisture in the protein is replaced with flavors of the beer brine that also hydrate the meat, increases the tenderness by denaturing the proteins, helps preserve the ingredient, and provides a temperature cushion, preventing the main course from drying out.
There are several ways to cook the finished Beer Brined Turkey. This recipe is for your classic oven-roasted turkey. Below this recipe are several links to all the ways this base recipe can be cooked. This recipe yields enough brine for a 16-24 pound turkey. The recipe can be doubled (setting the recipe scale to 32), to make a large batch of brine, that can be used to brine 2 turkeys.
If you have a smaller crowd, try my Beer Brined Free Range Chicken recipe.
Makes: enough brine for a 16-24 pound turkey, 4 whole chickens, or 10 Cornish game hens
Before You Shop:
Listen to my Home Brewed Chef podcast Thanksgiving Dinner Show for more Thanksgiving menu ideas, techniques, and recipes.
Check out my Thanksgiving Feast for more ideas, recipes, and suggestions.
Beer Brined Turkey Special Equipment:
1 each Thermapen® Mk4 Cooking Thermometer
and | or
1 each ChefAlarm ® Cooking Alarm Thermometer by ThermoWorks
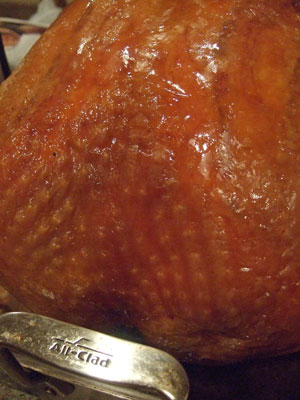
1 each All-Clad Stainless Steel Large Roti Combo with Rack and Turkey Lifters
Have turkey bones? Make the best Turkey Stock with this recipe.
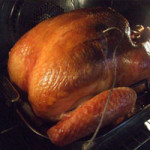
| Servings | Prep Time |
| 16 guests | 30 minutes |
| Cook Time | Passive Time |
| 3 1/2 hours | 2 - 3 days |
|
|

|
This Beer Brined Turkey recipe teaches you how to create a juicy, moist, and wonderful flavored turkey that will make your guests want to take all the leftovers home.
|
- 1 quart water filtered
- 2 cup salt, kosher do not use iodized salt
- 1 cup sugar, light brown
- 1 tablespoon peppercorns, black whole
- 4 each bay leaves preferably fresh
- 3 bunch thyme, fresh
- 3 each onions, yellow peeled and chopped
- 3 stalks celery chopped
- 3 each carrots, large peeled and chopped
- 6 each garlic, cloves peeled
- 1 each lemon cut into slices
- 1 each orange cut into slices
- 6 pound ice or 3 quarts ice cold water
- 1 gallon beer, ice cold such as American Brown Ale, Märzen | Oktoberfest, Bock or Scotch Ale | Wee Heavy, see note below on cooking beer suggestions
- 16 - 24 pound turkey preferably free range, organic or heritage
- 1 bunch sage, fresh
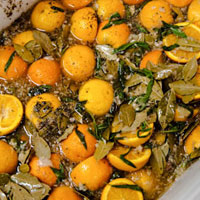
- At least 2 days in advance of Thanksgiving | event | Holiday, start the brine. In a large pot, over high heat, add the water, salt, sugar, peppercorns, bay leaves, thyme, onions, celery, carrots, garlic, lemon, and orange. Bring the liquid to a boil and simmer for 10 minutes to infuse the flavors together, dissolving the salt and sugar. Turn off the heat and let the brine cool for 20 minutes, then add in the ice and beer of choice. Mix the ingredients together and take the temperature of the finished brine. A thermometer should read 40°F | 4°C or lower in order to be safe to use. If it is warmer, place the pot into a refrigerator/kegerator until 40°F | 4°C is reached.
- Take the fresh turkey and remove it from its package in a large sink. Remove the neck, gizzards and liver, setting aside (for stock or gravy). Rinse the bird under cold water, turning the bird over a few times, washing any blood from the cavity and under the neck flap. Remove any remaining quills from the skin, if visible. Remove any excess fat from around the inside cavity. Turn off the water and lightly dry the turkey off with paper towels.
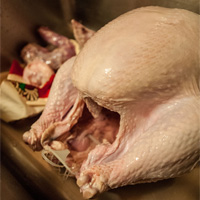
- For brining, have ready a Cambro 22 qt Polypropylene Food Storage Container
, large stock/brew pot, a brining bag or Ziploc XL HD Big Bag
. Place the turkey into the container of choice, then top off with the chilled brine, submerging the turkey completely. Then place in the cold storage, for example a refrigerator or kegerator.
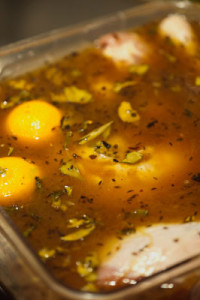
- If cold space is an issue, use a large cooler and sanitize it with a bleach-water solution (1 tablespoon of bleach per gallon of water or 200ppm) or Star San (1 ounce of StarSan per 2 gallons of water).
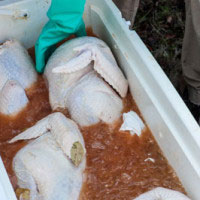
- Place the cooled beer brine into the now clean cooler and add the turkey. Use several gallon size seal-able bags fill with ice, to keep the bird and brine ice cold, but not diluting the salinity or flavor of the brine. This will also work if you are beer brining multiple turkeys at once and have doubled or tripled the beer brine recipe to fill the cooler size you are using.
- If you are using a Ziploc XL HD Big Bag
hold the bringing liquid and bird, place the sealed bagged turkey in the cooler and surround the bag with ice, to keep the turkey and brine ice cold.
- Beer brine the turkey for at least 24 (for a smaller bird 16 pound) to 48 hours (for a larger 22+ pound bird). Keep the turkey and brine cold during this marinating process. Every 12 hours, rotate/flip the turkey in the brine to evenly marinate it.
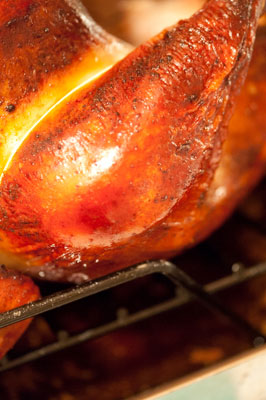
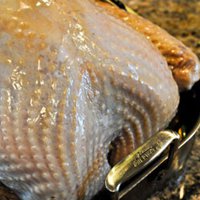
- Remove the turkey from the brine and dry well with paper towels, both inside and out. Repeat this several times, to get as much of the moisture removed. This will help the browning of the skin, as moisture will steam the skin instead of roast it. Place the turkey, backside down, in a roasting pan fitted with a rack
. Place the bunch of sage inside the cavity, as the herbs will release their aroma into the meat as it roasts. Let the turkey sit at room temperature for 2 hours prior to being cooked. This will let the turkey warm up, allowing it to cook more evenly. Discard the brine, as it has done its purpose and not safe to re-use.
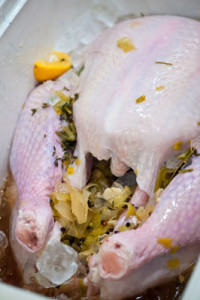
- With the beer brine, the turkey is fine to cook, once it is dried. To add extra flavor and decoration for when the turkey is served, you can dress up the turkey with some flavor bling. Using your fingertips, start at the neck and slide one finger inside the neck skin and start separating the skin from the meat. Gradually add a second finger to finally your whole hand (that is pressed flat against the breast meat), being very careful not to force, but separate the skin from the meat, as the skin can tear. Repeat this same process with the other breast. Once this is done, move to the open cavity, and on one side of the turkey start separating the skin from the leg/thigh, working around the thigh to the leg. Repeat this process for the other leg.
- Now that the skin is loose, the turkey can be stuffed with herbs, rubs, or bacon to add additional flavor to the turkey. And when the turkey cooks, the skin will display the garnish, creating a beautifully finished bird.
- Herbs: Try using a mix of fresh herbs like thyme, bay leaves, rosemary, marjoram, and | or oregano. Arrange the herbs in a pattern under the skin on each breast. Copy the pattern to the opposite breast to give the finish turkey symmetry when being presented. Use herbs to wrap around the legs and thighs too, creating a unique pattern with what herbs you have. A good tip is to start at the farthest part from you and work towards where you are stuffing from.
- Bacon: cured, smoked and sliced pork belly is another great option, as the fat of the bacon renders as the turkey cooks, adding another layer of protection from the breast meat drying out. I like to use thick-cut bacon, that has been smoked. Arrange the strips of bacon alongside the chest bone and but each strip right next to the last, working your way down the breast. Cut the bacon if it is too long with kitchen sears to fit. Then repeat on the opposite side of the turkey. For the leg/thighs, wrap the bacon around the legs, then continue with the thighs, creating a pinwheel effect. Press the skin down to remove any air pockets and help secure the bacon from sliding.
- Rubs: Since the turkey has been brined, seasoning the bird from the inside out, additional flavors should be just that, herbs and spices, not salts. If you have a favorite rub, check to see how much salt is used. Many commercial rubs use a lot of salt as a filler, as it is cheaper than the herbs and spices. Sprinkle the rub mix under the skin, creating an even coating on each side. Mixing the rub with some olive oil or room temperature unsalted butter to create a flavor paste can also be done, again giving the breast meat additional fat to help keep the meat moist and juicy as it cooks.
- Remember that the turkey has been seasoned with the brine. Once the skin has been dried thoroughly, you can brush/rub oil (such as olive oil or vegetable oil) all over the skin to help create a wonderfully crisp skin, or use room temperature unsalted butter to create a light coat of fat. Very lightly season the skin with salt and pepper if you wish.
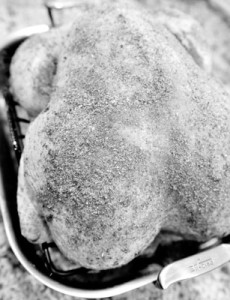
- A rub can also be used to create multiple flavors. A Cajun spice rub, fresh herb rub, or jerk spice can be used to give the turkey a culinary field trip. Be careful of the salt content of the rub, if you are using a commercially made rub, as salt is cheaper than herbs and spices.
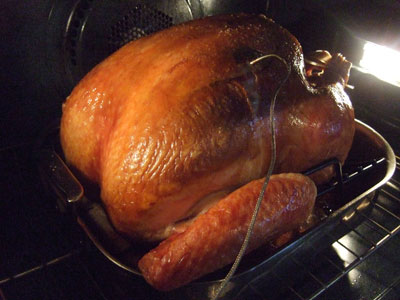
- Pre-heat the oven to 350°F | 177°C, convection roast/bake if this setting is an option. Truss the bird with twine, to help hold its shape and to aid in cooking the turkey evenly. I highly recommend using a probe thermometer
to make sure the turkey is cooked to a certain temperature (160°F | 71°C) verses a length of time. Insert the probe into the middle of a breast or in one of the thighs. Make sure the tip of the probe isn’t touching a bone, as the temperature reading could be false.
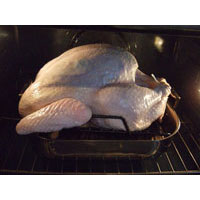
- If you don’t have a probe thermometer, a 16 - 20 pound turkey should take between 3 and 3 1/2 hours to fully cook to 160°F | 71°C. Check both the breast and the thigh temperature to make sure the turkey is evenly cooked. Other recipes describe cooking a turkey until the internal temperature reaches 180°F | 82°C and this is one reason for a dry turkey.
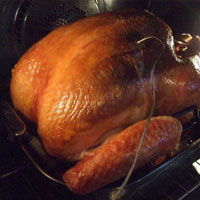
- Turkey is safe to eat after it reaches 165°F | 74°C. It's fine to remove the turkey from the oven at 160°F | 71°C, as the heat of the oven and the surface temperature is higher than the internal temperature. As the turkey rests, the carryover heat will finish cooking the turkey and bring it to a safe final cooking temperature of 165°F | 74°C.
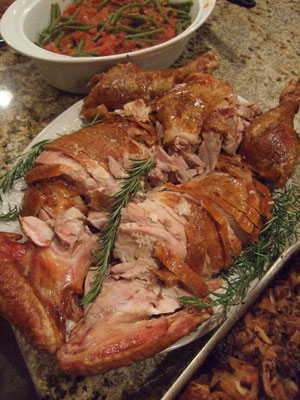
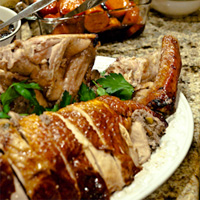
- Let the turkey rest at room temperature for 20 - 30 minutes before carving. This is critical in keeping a moist and juicy turkey. This resting will relax the muscle fibers, helping re-distribute the juices and allow the bird to be easier to handle when carving. Cover the turkey with a large sheet of aluminum foil.
Cooking Beer Suggestions:
With turkey meat much like it's fowl cousin chicken, there isn't a ton of unique flavor; it's very subtle. I have found that using beers that use a good percentage of melanodin malts add a rich flavor to the turkey, enhancing the maillard reaction that occurs during the cooking process. Beer styles like German Bocks, Doppelbocks, American Brown Ales, English Brown Ales, Dunkelweizen, Vienna Lagers, Roggenbier, Scotch Ale/Wee Heavy, Irish Red Ale and Märzens/Oktoberfest all compliment the flavors of turkey with this beer brine recipe. Below are some other beer style and brewery versions, each adapting the beer brine to fully utilize the beers nuances in flavoring the turkey.
More Beer Brined Turkey Recipes and Cooking Techniques:
Alternative Beer Brined Turkey Recipes:


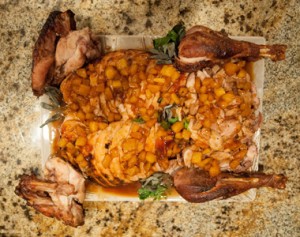
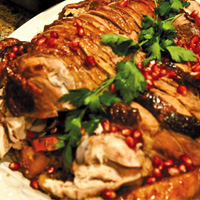
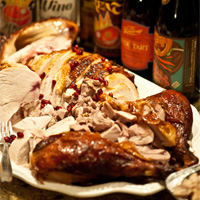


This looks absolutely fantastic, and even though it seems to be a bit time consuming to say the least. I think it would definitely be worth the effort. Weekend project anyone? My hand’s raised.
What you put in Jim, you get back and and then some! Thanks for the comment Jim.
I did this for thanksgiving and it came out fantastic! The meat was perfectly moist and well seasoned. I also used a bit of the brine veggies with stuffing inside of the bird for added pizzazz. Would definitely cook this again, everyone loved it.
BTW, I used Speakeasy Payback Porter for this.
We Beer Brined our turkey this year for Thanksgiving, because we are a gluten free family I used O Mission Pale Ale. It was a hit! Comments from around the table were, “…best turkey I’ve ever had!”
I’ve followed your recipe for years now. It’s always epic. One year I deep fried it after an Arrogant Bastard brine, the color of the crispy skin matched the beer exactly.
One year I used Celebration Ale from Sierra Nevada that was in my cellar for a few years. That bird turned out great also. The fresh hops taper off over time, but the malt character gets even more smooth.
Last two or three birds I’ve done the Spatchcock technique on my Traeger grill, and they are phenomenal. I smoke them for a bit using the nuttier woods like pecan or alder or cherry/red oak combo; then turn it up to 275, and then when I can’t wait any longer, I crank it up till the meat hits a good 160 and then yank it and rest for 20.
They always turn out moist and lots of earthy flavor, very savory. The smoke ring is very pronounced, lots of moisture at the edges suck in the flavor at the start of the cooking. Not only does it work well using Butterballs, my preference is an organic Diestel or free range fresh bird and it is great.
This year I used Diamond Crystal Kosher salt again, I splurged once with pink Himylayan and didn’t really notice any difference.
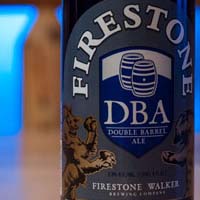
This years Thanksgiving bird had a plethora of brown ales. I used Anchor’s Big Leaf Maple Ale, Big Sky’s Moose Drool Brown , Figueroa Mtn Davy Brown and Firestone’s DBA. Just the right amount of sweetness, not to much and the skin was very crisp and a slight caramelization on it.
I also used your stuffing recipe with a DuPont Saison. That was epic. The light beer really made the stuffing brighten up.
Like I said, I’ve beer brined birds for several years now. Three other in laws and about a dozen friends now use this recipe as the standard. It’s solid. The meat always turns out exceptional and you go away the hero.
Thanks for being part of our family’s traditional gathering.
Once again, I brined our Thanksgving turkeys with this fantastic recipe. One turkey was smoked and one roasted. The only change this year is that I experimented with a little less salt and a slightly shorter bath. I used 25% less salt (1.5 cups) and brined for about 16-18 hours (I had 13-14 lb turkeys). The reason I did this was because my mother-in-law abhors the (over) use of salt (was married to a kidney doc for years, go figure). Anyway, she loved the turkeys and the salt level. I felt they turned out great, but next year, I will keep them in the bath for closer to 24 hours to maximize full potential in juicy juice levels. I also experimented with aged beer. I had a blend of some old malty styles that were way to oxidized to drink, but married perfectly with the roasted bird. And you’d never know it wasn’t fresh beer. This recipe makes the BEST brine for birds!
I followed your beer brine turkey recipe, brined it for 48 hours, and cooked it on a round Weber grill with a bit of cherry wood. It was the best turkey I have ever made!
I’m looking forward to trying this! I’ll do the under the skin herb roasted method with a bit of jerk seasoning. I have a question. When the turkey goes in the oven, wouldn’t I have some type of liquid in the pan?
The jerk under the skin will give a nice flavor to the turkey. You could also add some jerk marinade to the brine to add more flavor. I would keep the turkey as dry as you can, not adding any liquid to the pan, as the turkey will steam instead of roast.
does it taste like beer? I will be serving to kids
This recipe creates a wonderful juicy turkey that has hints of beer, yet they meld with the meat, making a delicious bird. The alcohol cooks out and it is safe for kids. Mine has eaten a beer brine turkey every year since she started eating solid foods…
This turned out great. Had a smaller bird, so brine was about 24 hours. Used Odells OctoberFest. Smoked for 3-4 hours. Took the backbone out to smoke and seasoned with a mixture of fresh herbs. Came out super moist and tasty. Thanks!
Glad you enjoyed the recipe William. Humbled to be apart of your Thanksgiving feast!
Any issues with closer to a 60 hour brine on a 18 pound bird?
That is a long time to brine a smaller turkey. The turkey can be removed from the brine and left to rest in the refrigerator, to dry and chill before you are ready to cook it.
On a budget here, used Trader Joe’s hef and a pre frozen grocery store bird and this brine completely brought it to the next level! Definitely worth the extra time and steps! Fresh herbs are key, can’t wait to do this again in a couple weeks!
This is nice article and recipe too. I have learned how to make different way. Thanks for this recipe.
You are very welcome! Thanks for sharing and hope you enjoy the results of the recipe! Cheers and Eat Beer!
I would love to try this. I use a Showtime Rotisserie for my turkey, and it always comes out great. What do I need to do differently if I use this beer brine? Prompt response would be SO APPRECIATED. Thank you.
Hello Michelle, I have not used a Showtime Rotisserie for cooking this recipe. Yet, as the beer brine step is more internal than external, it should be fine. I would recommend keeping an eye on the skin. Make sure the bird’s skin is as dry as possible, using paper towels. As the brown sugar and any residual sweetness from unfermented sugars in the beer might cause the skin to brown and even burn, faster. It all depends on how close the turkey is to the burner element of the rotisserie. If you can adjust that distance, I’d suggest setting it further away. Again, this depends on the size of the turkey you are using as well.
Basting the turkey, as it cooks might also help. I’d still keep an eye on it.
Please let me know how it turns out! Would love for others to hear about your experience in cooking with a rotisserie!
Cheers,
Sean